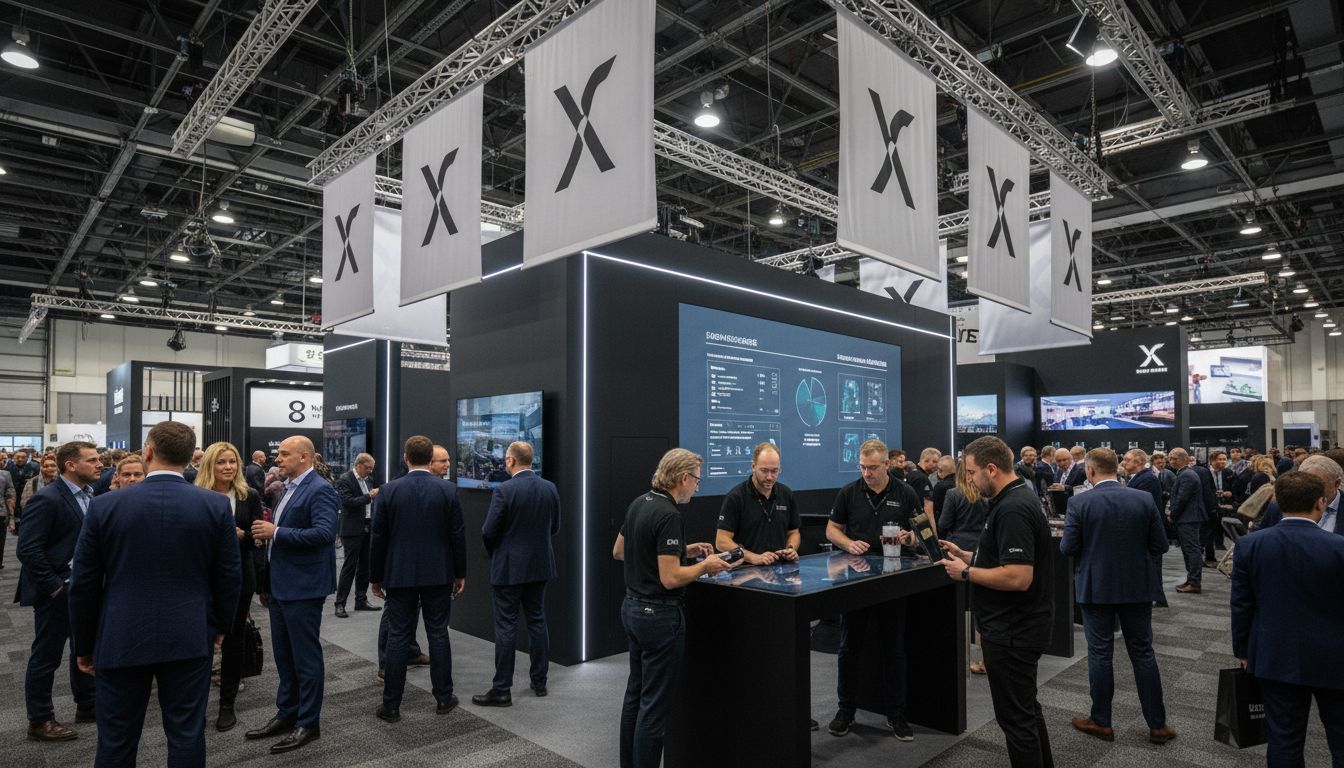
More than 80 percent of american event marketers believe that compelling display design drives stronger audience engagement. In settings where first impressions shape every connection, creating a visually powerful event display can set your brand apart from the crowd. Whether aiming to boost brand awareness or capture leads, learning how to define clear goals and smart design choices sets the stage for event success that resonates with every visitor.
Table of Contents
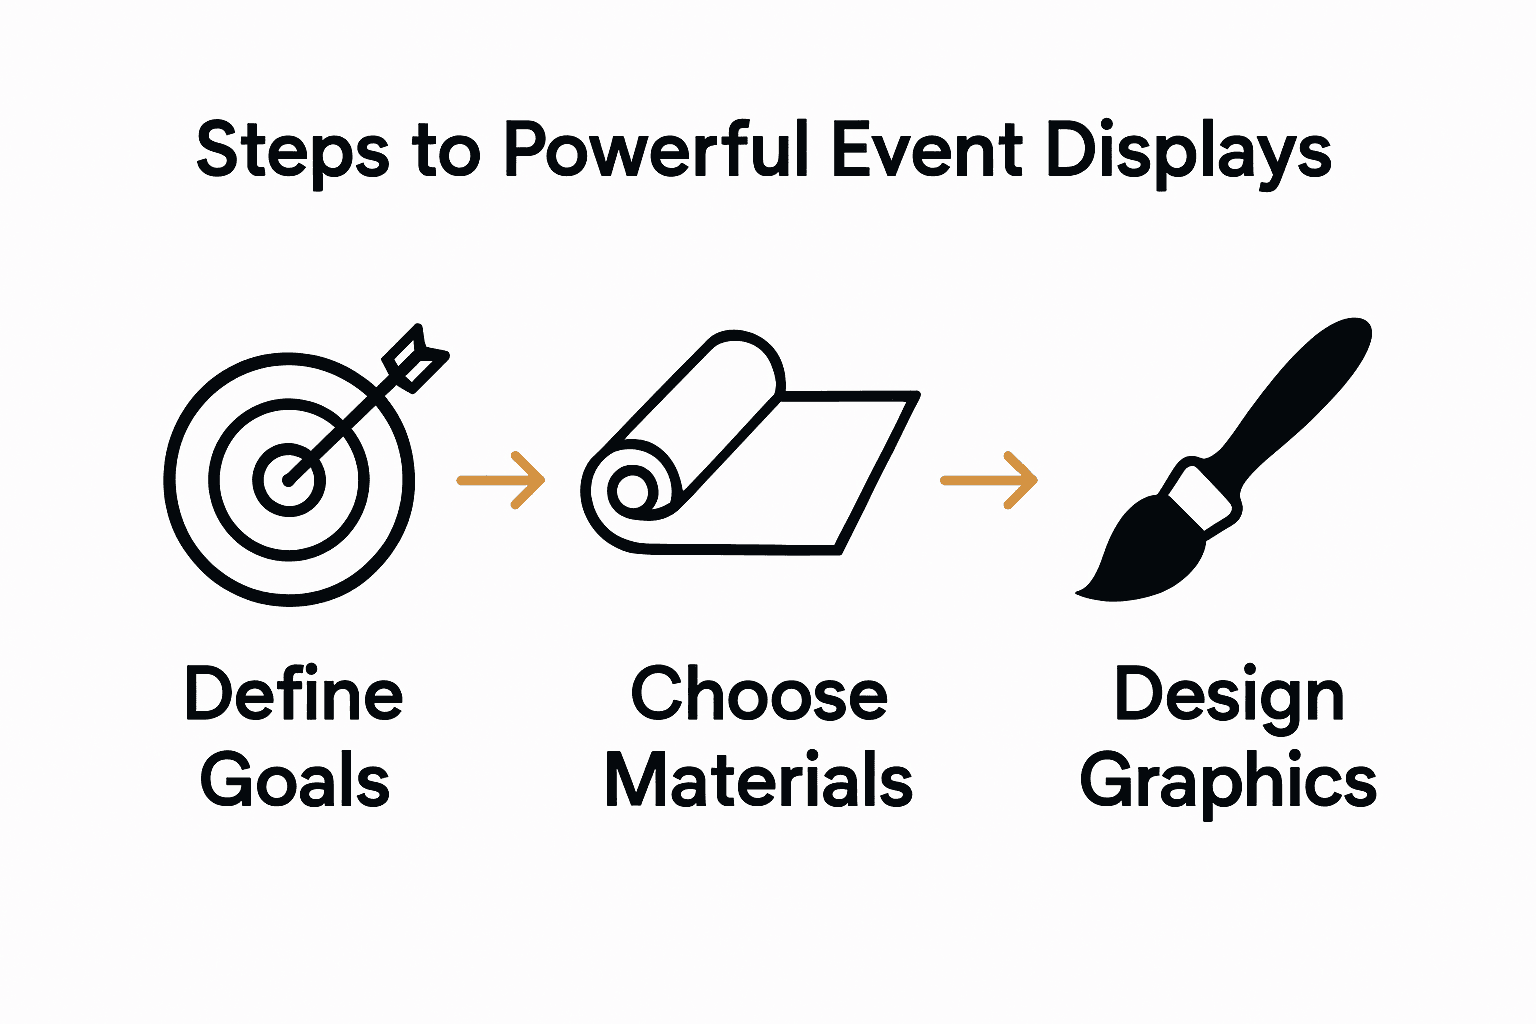
- Step 1: Define Event Goals And Branding Requirements
- Step 2: Select Custom Display Products And Materials
- Step 3: Create Engaging Graphics And Messaging
- Step 4: Customize Layouts For Space And Audience Flow
- Step 5: Review, Test, And Finalize Your Display Design
Quick Summary
| Key Insight | Explanation |
|---|---|
| 1. Define clear event goals | Establish specific objectives to guide your event display design, like enhancing brand awareness or generating leads. |
| 2. Choose appropriate materials | Select display materials that align with your brand goals and create a professional appearance, ensuring they stand out effectively. |
| 3. Design engaging graphics | Use bold visuals and clear messaging to capture attention and communicate your brand identity quickly to viewers. |
| 4. Customize layout for flow | Plan your display layout to optimize attendee movement and interaction, allowing comfortable navigation and engagement. |
| 5. Test and refine your design | Conduct thorough testing of display designs to ensure clarity and effectiveness, gathering feedback for final adjustments. |
Step 1: Define Event Goals and Branding Requirements
Designing a powerful event display starts with crystal clear goals and a strategic branding approach. According to ScienceDirect, organizations increasingly use events to communicate their brand strategy effectively, making goal definition a critical first step in your event display design process.
To establish your event goals, start by asking targeted questions about your brand’s objectives. Are you launching a new product? Increasing market awareness? Generating leads? Each goal will dramatically influence your display design. EVM Institute recommends using the DAGMAR model to set measurable objectives, such as increasing brand recall among your target audience within a specific timeframe.
Pro tip: Your event display should visually translate your brand’s core message. This means selecting color schemes, graphics, and layout elements that instantly communicate your brand’s personality and value proposition. Remember that attendees make split second impressions, so every visual element must work harmoniously to tell your brand’s unique story.
Once you’ve defined clear goals and branding requirements, you’re ready to move into the next phase of display design where these strategic insights will guide your creative decisions.
Step 2: Select Custom Display Products and Materials
Selecting the right display products and materials is a critical step in creating an impactful event presence. ArXiv research reveals exciting advancements in display technologies, showcasing innovative options for creating custom event displays that can truly make your brand stand out.
When choosing materials, consider factors beyond basic aesthetics. Look for products that align with your brand goals and event objectives. Lightweight aluminum frames, tension fabric graphics, and modular components offer versatility and professional appearance. Materials like photoreactive luminescent films can create dynamic visual experiences that capture attendee attention. As ArXiv research demonstrates, emerging technologies now enable high saturation and efficiency in display design, giving you more creative possibilities than ever before.
Pro tip: Always request material samples before committing to a full display. Different lighting conditions and event environments can dramatically impact how materials look and perform. Check durability, color accuracy, and how graphics reproduce under various settings.
With your custom display products and materials selected, you are now ready to move into the design and layout phase of your event display strategy.
Step 3: Create Engaging Graphics and Messaging
Designing compelling graphics and messaging is crucial for capturing audience attention and communicating your brand’s core message. Springer Link research highlights the importance of creating event-typical advertisements that align closely with the event’s theme, effectively capturing consumer interest by generating a sense of familiarity and curiosity.
Start by developing a clear visual hierarchy that guides viewers’ eyes through your display. Use bold, high-contrast graphics that communicate your key message within seconds. Your typography should be legible from a distance, with font sizes and styles that reflect your brand’s personality. Color selection matters immensely choose a palette that not only matches your brand guidelines but also stands out in a crowded event space. Incorporate your logo prominently, but avoid overwhelming the viewer with too much visual information.
Pro tip: Test your graphics under different lighting conditions and from various distances.
 What looks perfect up close might become illegible from across the room. Consider creating mockups or digital previews to ensure your graphics will have the desired impact.
With your engaging graphics and messaging in place, you are now prepared to move into the crucial phase of display layout and strategic positioning.
Step 4: Customize Layouts for Space and Audience Flow
Customizing your event display layout requires strategic thinking about space utilization and audience interaction. Wikipedia highlights that professional exhibition designers focus on creating layouts that optimize audience flow and engagement through careful planning and thoughtful design.
Begin by mapping out your available space and creating a strategic floor plan that guides visitor movement. Consider creating multiple interaction zones within your display area positioning key messaging and product demonstrations where attendees naturally pause. ArXiv research showcases innovative display techniques like pseudo-holographic screens that can transform traditional layout approaches, offering immersive presentation opportunities that capture audience attention.
Pro tip: Always leave enough open space for comfortable navigation. Cramped displays feel overwhelming and can discourage attendee interaction. Aim for a layout that allows at least 3 to 4 feet of walking space between display elements, ensuring visitors can move freely and engage with your brand without feeling constrained.
With your layout carefully planned, you are now prepared to implement the final touches that will bring your event display to life.
Step 5: Review, Test, and Finalize Your Display Design
The final stage of creating an exceptional event display involves meticulous review, testing, and refinement. ArXiv research highlights emerging technologies that enable precise digital testing of display designs, offering advanced methods for evaluating and perfecting visual presentations.
Conduct comprehensive testing by creating mockups and prototypes that simulate real event conditions. Examine your display from multiple perspectives consider how it looks from different distances, angles, and lighting environments. Wikipedia suggests exploring innovative display technologies that can dynamically adjust color and orientation, providing flexible options for fine-tuning your design.
Pro tip: Involve team members or trusted colleagues in your review process. Fresh eyes can catch potential issues you might have overlooked. Ask for honest feedback about visual clarity, messaging effectiveness, and overall brand representation. Pay special attention to how quickly and easily viewers can understand your key message from a distance.
With your display design thoroughly reviewed and refined, you are now ready to prepare for a successful and impactful event presentation.
Elevate Your Event Display for Unmatched Brand Impact
Designing an event display that truly connects with your audience starts by addressing your biggest challenges Headaches like unclear goals, choosing the right materials, and crafting engaging graphics stand between you and maximum brand impact. This article walks you through these crucial pain points ensuring your display not only looks vibrant but also communicates your core message effectively and guides visitor flow naturally
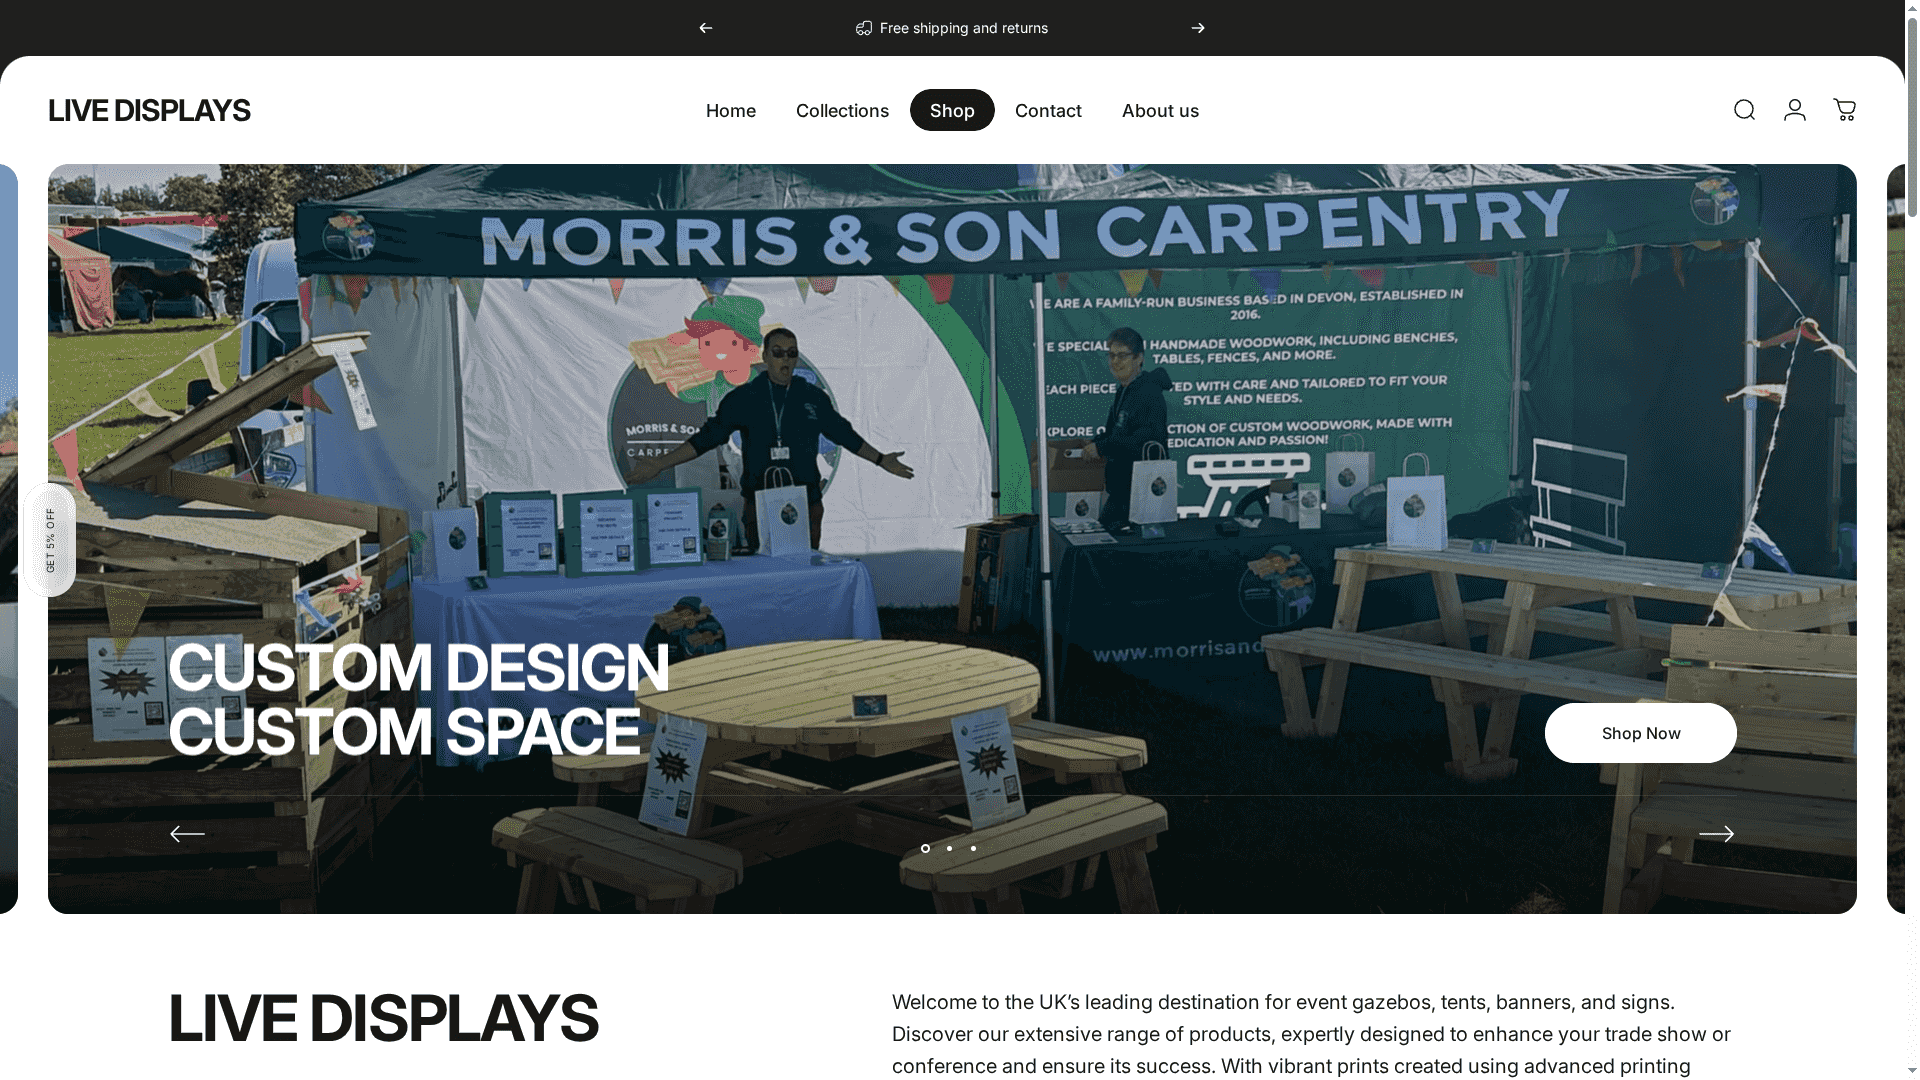
Transform your vision into reality with our wide selection of premium products designed to meet these exact needs Whether you want eye-catching banners or sturdy gazebos Live Displays has you covered Explore our Roll Up Banner Stands – LIVE DISPLAYS for bold messaging options or our Gazebos – LIVE DISPLAYS to create engaging interaction zones that invite visitors in
Take control of your event presence today with customized solutions backed by high-quality printing and expert support Visit Live Displays now and start designing a display that demands attention and drives results Don’t wait Because every event is an opportunity to elevate your brand and make unforgettable impressions
Frequently Asked Questions
How do I define clear goals for my event display design?
To define clear goals, start by asking yourself what you want to achieve with your display. Consider objectives like launching a new product, increasing brand awareness, or generating leads, and then craft specific measures to evaluate success, such as improving brand recall by 30% within three months.
What materials should I choose for my event display?
Select materials that align with your branding and display objectives, such as lightweight aluminum frames and tension fabric graphics for versatility. Always request samples to see how they perform under different lighting conditions before finalizing your choice.
How can I create engaging graphics for my event display?
Design engaging graphics by establishing a clear visual hierarchy that emphasizes your key message and uses bold, high-contrast elements. Ensure that typography is legible from a distance and fits your brand’s personality, and test graphics in various lighting settings to optimize impact.
What layout strategies should I consider for audience engagement?
Customize your layout by mapping out available space and creating interaction zones that guide visitor movement. Allow for at least 3 to 4 feet of walking space between elements, enabling comfortable navigation and increased attendee interaction with your brand.
How do I review and finalize my event display design?
Review your design comprehensively by creating mockups that simulate real event conditions, observing from different distances and angles. Involve team members for feedback on visual clarity and messaging effectiveness, and aim to address any identified issues to ensure a polished presentation at the event.
Share:
Complete Guide to the Role of Portable Displays
Exhibition Setup Basics: Complete Guide for Success